
Looking for a fun and easy DIY suitable for a young adult cancer survivor, patient, or caregiver? This diy embroidery floss belt is a great one…easy, portable, and it doesn’t take a ton of brain power 🙂 It also has the added bonus of resulting in a great accessory! Looking for an easy project for a kiddo in your life? Look no further! 🙂
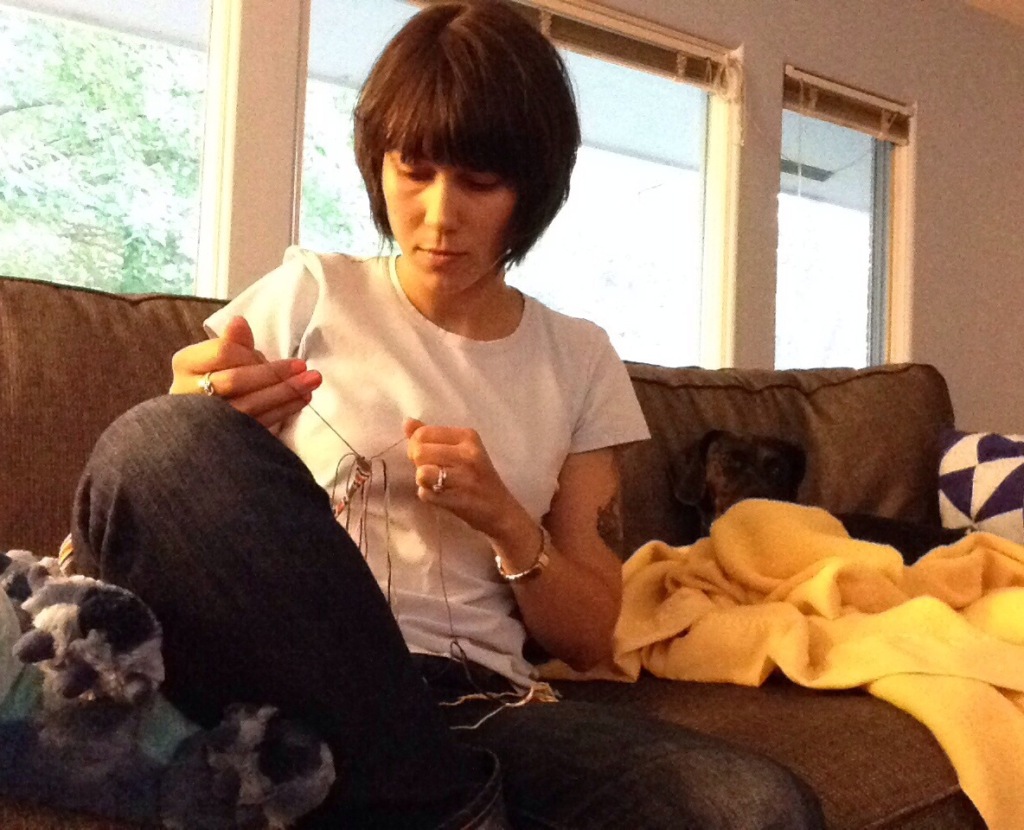
All you’ll need are a few colors of embroidery floss…I used 6 colors and used each color two times per row of belt. This diy is super simple and definitely will take you back to the days of friendship bracelets and summer camp. So! To make this diy embroidery floss belt (or bracelet!), take your chosen colors, unwrap each of the skeins (the bundles of embroidery floss are called skeins), bundle them all together, fold the bundle in half, and tie a knot at the halfway point. You definitely don’t have to fold over the strands to double them up…you *could* just straighten out the skeins and tie them together at the top. I did the fold over process because I wanted the added width that this would provide.


Then, separate out the colors to get started. My first strand of color is yellow. You can use whatever colors you want but I’ll tell you which strands on the belt go with which of my colors to help illustrate the method.
I take that first strand (yellow), and fold it over the next strand (mine is navy blue), creating the shape of a number 4. The tail of the first strand (yellow) then gets looped around the second strand (blue) and looped through. This is shown in the picture below. Once this is done, pull the first strand (yellow) tight and up towards the top, creating a knot. Tie two of these “four” knots for your first strand (yellow), around your second strand (blue).

You will tie 2, “4” knots of this first strand (yellow) onto each of the subsequent strands in turn. This creates your first row. To start your second row, continue onto the second strand (navy blue), tying two “4” knots of the second strand (navy blue) around the third strand (mint green). This process continues until you have finished tying “4” knots of the second strand (navy blue) around each of the subsequent strands. That finishes your second row. And, that’s it! Just keep going, creating rows of these “4” knots with each colored strand. I suggest looping your top loop (as shown below) onto something so that everything stays in place better while you’re working.

Following these instructions, your belt/bracelet will naturally obtain this cool looking slant! If you’re interested in a different style, look here for other tutorials and designs. (I thought this one and this one looked pretty!)

Now just keep going until the diy embroidery floss belt is as long as your young adult cancer survivor heart desires 🙂 Want a bracelet instead? Great! You’ll be done a whole lot sooner!
Have you tried a belt or bracelet project like this before? Would you teach this to your kiddos?